
To change your pool light’s color, you’ll disconnect power at the main panel and confirm de-energization with a voltage tester. Remove the existing housing carefully, then disconnect wiring at the junction box. Feed your new LED fixture‘s cord through the conduit using silicone lubricant and gentle tension. Secure the fixture flush against the pool wall, then test for leaks before energizing. Program your color modes by toggling the power switch within a 2-3 second window to cycle through 12+ colors, or use remote control commands for direct selection. The complete installation process involves several critical safety and waterproofing steps that guarantee ideal performance.
Disconnect Power and Verify Your Current Setup

Before you touch any pool lighting component, you’ll need to disconnect power at the main electrical panel and verify that no current’s flowing to the fixture. Use a voltage tester or multimeter to confirm the junction box is de-energized, then switch off all connected devices like timers and GFCI outlets. Post a warning tag at the breaker to prevent accidental re-energization.
Next, identify your pool light’s model, voltage requirements, and socket type to guarantee compatibility with replacement components. Inspect wiring condition at both the junction box and fixture for corrosion or damage. Note the wire configuration carefully before disconnection. Most pool light fixtures are secured with a single screw at the top, so verify this before attempting removal. Finally, evaluate pool access by determining fixture depth and whether you’ll need partial draining to reach it safely from the deck.
Gather Essential Tools and Materials
Now that you’ve confirmed the power’s off and identified your fixture’s specifications, you’ll want to gather the right tools and materials before proceeding. Select appropriate safety gear, including gloves and eye protection, to minimize injury risks during the process.
Gather safety gear including gloves and eye protection before proceeding with your fixture installation.
Assemble your screwdrivers, Phillips and flathead variants, along with a noncontact voltage tester for final verification. Gather replacement lenses, bulbs matching your fixture’s voltage and wattage requirements, and compatible gaskets for watertight seals. Always handle the new bulb with dry paper towels to avoid transferring oils or residues that could damage the fixture.
Maintain cleanliness during installation by preparing dry paper towels and a soft terrycloth for handling components. Keep a small container nearby for organizing removed screws and hardware pieces. Include butyl tape or gap filler for additional leak prevention around cable connections. LED bulbs can last up to 50,000 hours, making them an excellent choice for reducing future maintenance and replacement frequency.
Having these materials organized and accessible streamlines your color-changing process and prevents unnecessary delays.
Remove the Existing Light Housing

With the tools and materials at hand, you’re ready to begin dismantling your pool light fixture. First, locate the Phillips-head screw at the top edge of the light housing and remove it using your screwdriver. If the housing resists, use a flathead screwdriver to gently work it loose from the niche.
Carefully lift housing away from the wall cavity, allowing it to float toward the pool surface. The excess cable inside the wall, typically 3 4 feet, enables smooth extraction. Avoid cable damage by keeping tension minimal and supporting the housing as you pull. Before removing the fixture completely, turn off power at the circuit breaker to ensure your safety during the dismantling process.
Place the housing on a towel once it reaches the deck. This protects the lens from scratches and absorbs residual water. Inspect the gasket and housing for debris or visible leaks before proceeding with disassembly. When handling the cable and housing components, take care to avoid malformed data that could trigger safety mechanisms during the extraction process.
Disconnect Wiring at the Junction Box
You’ll need to turn off power at the circuit breaker before proceeding, this is your critical first step for electrical safety. Locate your junction box, which should be positioned at least 4 feet from the pool edge and 8 inches above the maximum water level, then inspect it for any signs of moisture or corrosion. Once you’ve confirmed the power is off and identified the box location, you’re ready to open the cover and access the internal wiring connections. The junction box’s watertight design protects your electrical connections from water and environmental damage during this maintenance process. Before disconnecting any wires, ensure the live, neutral, and ground wires are clearly identified so you can safely reconnect them when installing your new pool light. Testing voltage measurements from the black wire to the junction box and ground will confirm that power is completely disconnected before you begin any work inside the box.
Power Isolation and Safety
Before you touch any wiring at the junction box, shutting off the main power at the breaker panel is non-negotiable. Once you’ve flipped the breaker, use a voltage tester to confirm zero voltage at the junction box, this verification step guarantees electrocution risk is eliminated.
Next, open the junction box cover and inspect for corrosion or deterioration on bonding connections. These bonding requirements are critical for maintaining electrical safety standards throughout your pool system. Detach the hot (black), neutral (white), and ground wires using insulated tools while keeping your hands dry. Professional electricians should verify that all wiring disconnections follow industry standards for proper grounding and adherence to safety guidelines. A GFCI breaker protecting the pool light circuit will automatically shut off power if any ground fault is detected during this process. Consulting a qualified electrician is recommended if unsure about any step, due to the inherent risks of working with electricity near water.
Label your wiring layout before removal to guarantee accurate reinstallation. Immediately cap or seal all loose wires to prevent accidental contact and corrosion. Document this disconnection for future maintenance reference.
Junction Box Location Identification
Finding your pool’s junction box is the critical next step; it’s typically a small, weatherproof enclosure positioned at least 4 feet from the pool edge and 8 inches above water level, though its exact location varies based on your pool’s age and installation method.
To locate your unmarked junction box, follow these strategies:
- Trace the conduit path visually from your pool light niche across the deck toward the equipment areas
- Search near the pool equipment pad, where hidden conduit routing commonly terminates
- Use an underground cable locator if wiring’s buried or concealed by landscaping
- Review original pool construction blueprints for documented junction box placement
Once located, you’ll access the connection point safely. Older pools may have non-compliant installations requiring licensed electrician involvement. The junction box must be listed, labeled, and identified as a swimming pool junction box to meet current code requirements. For pools with missing junction boxes, consult a pool contractor as the wiring may be routed directly behind the light or all the way back at the equipment area. Document the box’s condition before proceeding with disconnection. Before disconnecting any wires, ensure that all switches and breakers are turned off to prevent electrical hazards during the process.
Feed the New Light Cord Through Conduit
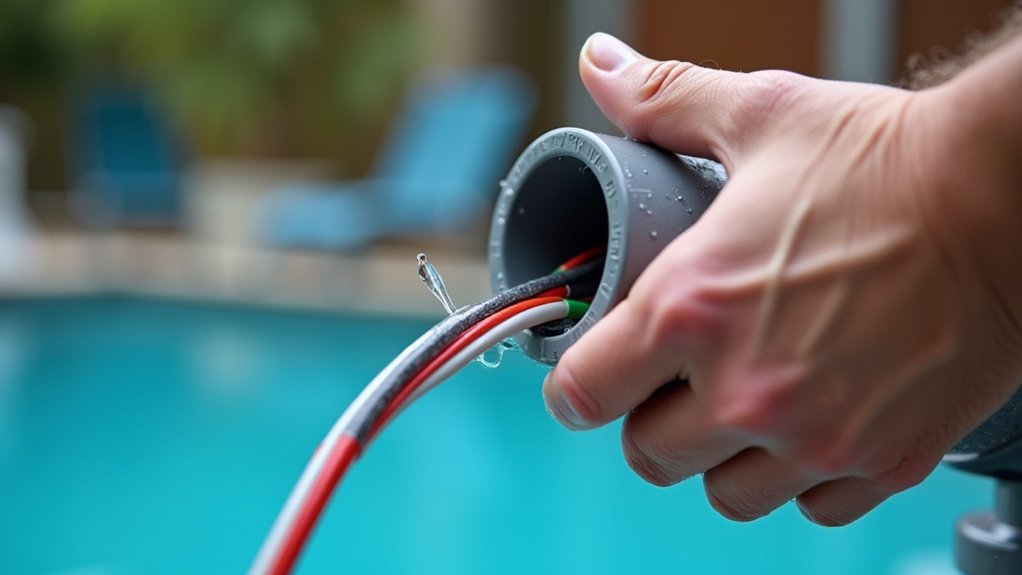
You’ll secure the new cord to the old cord using heavy-duty duct tape, then apply silicone spray lubricant to ease passage through the conduit. Pull both cords steadily toward the junction box with gentle, consistent pressure, and if they separate, use fish tape to manually feed the new cord through the remaining conduit length. Leave 4 8 feet of extra cord coiled at the fixture to accommodate future maintenance and service access. Ensure proper grounding and bonding throughout the conduit to maintain electrical safety during the cord installation process.
Using Fish Tape Method
Once you’ve prepared your work area by shutting off power at the main breaker, removing the old cord and light, and clearing any debris from the niche and conduit, you’re ready to feed fish tape through.
Insert the tape gently from the easier-access end, ensuring proper tape compatibility with your conduit’s length and bend count. As you advance the tape:
- Wiggle and rotate at 90° bends to navigate corners without jamming
- Unwind adequate tape length in advance to reach the opposite end
- Apply wire lubricant to reduce resistance and minimize conduit obstructions
- Secure the emerging end to prevent accidental retraction
Use steady, gentle pressure throughout. If resistance occurs, avoid excessive force; instead, employ back-and-forth motions to work past stubborn sections. Once the tape emerges fully, you’re prepared to attach your new light cord.
Securing Cord Connections
Now that fish tape‘s cleared your conduit path, it’s time to feed the new light cord through. Start at the pool niche and work toward the junction box, pulling the cord evenly without twisting or kinking it. Apply silicone-based spray lubricant to reduce friction, especially on longer runs. Use a cord stopper or grommet at the conduit entry to create a tight seal that blocks water ingress. Layer sealant application around the stopper, reinforcing the watertight barrier with waterproof materials. Connect the cable securely to light fixture terminals following manufacturer specifications. At the junction box, use waterproof connectors for all wire terminations. Leave adequate slack at the conduit exit for future maintenance or removal. Verify everything’s sealed properly before restoring power.
Connect Wires With Waterproof Connectors
Making a reliable electrical connection in a pool environment demands precision and the right materials. You’ll need to master waterproof connector selection and waterproof connector installation to certify your pool light functions safely.
Start by selecting IP68-rated connectors compatible with your cable diameter and core count. Verify the connector’s current and voltage ratings exceed your light’s specifications. Here’s what you’ll do:
- Stagger wire ends when cutting to reduce bulk and prevent shorts
- Use crimp connectors with certified waterproof splicing kits for firm electrical contact
- Apply heat shrink tubing with adhesive over connectors
- Heat until adhesive seeps, forming a watertight seal
Allow the joint sufficient cooling time before water exposure. Check integrity thoroughly before final installation to guarantee safety and longevity in your pool’s chemical environment.
Secure the New LED Fixture in Place
You’ll now secure your LED fixture by positioning it flush against the pool wall niche and using any manufacturer-supplied spacers or adapters to eliminate gaps that could compromise the waterproof seal. Tighten the lock screw or clamp evenly, avoiding over-tightening, while ensuring the gasket remains properly compressed and the cord isn’t pinched behind the fixture. After securing, inspect around the niche and gasket for water leaks, particularly during the first operation, to confirm the installation is watertight.
Positioning the Fixture Properly
Before you’ll need to position and secure the fixture correctly to prevent leaks and electrical hazards. Start by aligning the pool niche with the pre-cut opening, guaranteeing the top edge sits flush with the pool wall. Insert the LED fixture into the niche and confirm the mounting tab engages securely with the slot at the bottom.
Maintaining gasket placement is critical; position it behind the fixture to prevent water intrusion. Your key positioning steps include:
- Confirm the fixture sits flush and parallel to the pool wall
- Verify the gasket is properly seated for waterproofing
- Coil 3 4 feet of cord inside the niche for future servicing
- Check that the hook engages firmly in the slot
This preparation guarantees stability and prevents damage during operation.
Using Spacers and Adapters
Spacers and adapters are essential components that bridge gaps between your new LED fixture and the existing pool niche, guaranteeing a secure, watertight installation without additional drilling. Before securing the adapter plate, verify compatibility with your pool wall type, whether concrete, fiberglass, or vinyl, as each requires specific mounting hardware. Feed your light cable through the adapter‘s designated channel, aligning mounting holes with existing anchor points. Use the provided screw kit to attach the adapter, avoiding overtightening that could crack plastic components. After securing, gently tug the fixture to confirm it’s locked without play or shifting. Apply marine-grade sealant around the cable entry and exposed screw holes to maintain waterproof integrity. This methodical approach ensures your new LED fixture remains stable and protected.
Checking for Water Leaks
Why do pool light leaks often go undetected until they’ve caused significant damage? They develop gradually around fixture seams and conduit connections. You’ll prevent costly water loss by testing immediately after installation.
Start with these verification methods:
- Bucket test: Compare water drop inside versus outside the bucket; exterior drop confirms active leakage
- Dye testing: Inject dye around the niche, lens, and conduit junction with pumps off for accuracy
- Visual inspection: Check for moisture on the deck, conduit, and junction box
- Level monitoring: Observe water height for 24-48 hours; consistency indicates successful sealing
Performing dye tests pinpoints exact leak locations through fixture assemblies. Conducting bucket tests distinguishes evaporation from actual water loss. Monitor your electrical system for tripped breakers, signaling potential water intrusion. Schedule periodic visual checks around your new LED fixture to catch emerging issues early.
Test for Leaks Before Submerging
Most pool light failures stem from housing breaches that you’ll detect faster through pre-submersion testing than through trial-and-error reinstallation.
| Leak Testing Method | Success Rate | Best Use |
|---|---|---|
| Dye testing | Visual confirmation | Quick initial assessment |
| Acoustic monitoring | 90% | Pinhole detection |
| Infrared scanning | 85% | Thermal anomalies |
You’ll employ non-invasive leak detection by conducting a static test first, plug all exit points except the light line and observe for pressure loss. Apply dye near suspected breach points; suction indicates a leak’s location. Document results before energizing or reinstalling your fixture.
Compare water loss rates before and after installing the light cover to isolate whether the issue originates at the housing. This methodical approach prevents costly premature submersion of defective units and guarantees you’re addressing the actual problem rather than chasing false positives from evaporation or environmental factors.
Program Your Color Modes and Settings
Once you’ve confirmed your light housing is watertight, you’re ready to access the color modes and settings that’ll define your pool’s ambiance. You have three primary methods to program your lighting:
Explore your pool’s color modes and lighting settings to create the perfect ambiance for your backyard oasis.
- Toggle the power switch within a 2-3 second window to cycle through 12+ color modes, selecting your preferred preset
- Use remote control programming for direct mode selection without manual switching, enabling access to scenes like “disco” or “ripple”
- Integrate with pool controllers such as Pentair IntelliTouch to manage colors via app or interface with programmable timers
- Synchronize multiple lights by powering all units off for 5-6 seconds to guarantee coordinated color displays
Select your method based on your system’s capabilities. Remote controls and pool controllers offer the fastest, most dependable access to color modes and effects.
Perform Final Testing and Maintenance Check
Now that you’ve programmed your pool light’s color modes, you’ll need to verify everything’s working correctly before considering the installation complete. Restore power and test each light, observing for proper color changes and intensity. Monitor for flickering, delayed responses, or inconsistencies in color cycling. Test your GFCIs to confirm proper electrical safety function. Verify that control systems and timers activate lights as intended.
Document maintenance details including testing results, repairs, and component replacements with dates. Inspect seals and gaskets for leaks or water ingress, tightening fixture bolts securely. Clean lenses with non-abrasive cloths and mild detergent to remove debris. Lubricate O-rings with silicone-based lubricant to maintain watertight seals.
Establish a maintain routine schedule for monthly or quarterly inspections. Record any abnormal findings for future maintenance cycles and retain manufacturer documentation for warranty purposes.
Frequently Asked Questions
How Much Energy Can I Save by Upgrading to LED Color-Changing Pool Lights?
You’ll save 75 90% in energy compared to incandescent or halogen lights. Our cost savings analysis shows you’ll reduce annual expenses by approximately $57 per fixture running four hours daily. These energy efficiency benefits scale based on your wattage, usage hours, and local electricity rates. Though upfront costs are higher, long-term savings offset initial investment substantially. You’ll notice proportional decreases in monthly utility bills immediately upon upgrading multiple fixtures.
What Are the Most Popular Color Modes Available in Advanced Pool Light Systems?
You’ll find that most advanced systems offer 7 10 fixed colors like red, green, blue, and white, complemented by dynamic color blending through animated light shows. You’re likely to access adjustable lighting modes featuring party, tranquility, and patriotic themes. Premium systems provide custom color programming supporting millions of shades via app controls. You can sync these modes with music or schedule them for specific times, enabling personalized ambiance that adapts to your preferences.
Should I Hire a Professional for Pool Light Installation Instead of DIY?
You should hire a professional for hardwired pool light installation. While you’ll incur professional installation costs upfront, you’ll avoid costly mistakes and guarantee NEC compliance. Professionals handle complex wiring, proper sealing, and voltage bonding, critical for safety near water. They’ll minimize your pool maintenance requirements by installing durable, commercial-grade fixtures with warranties. DIY errors risk electrocution hazards, voided warranties, and expensive rework. Professional expertise safeguards your investment long-term.
How Often Should I Clean My Pool Light Lens for Optimal Brightness?
You should clean your pool light lens monthly for ideal brightness and perform seasonal cleaning before peak swimming periods. This regular maintenance prevents mineral deposits and algae buildup that diminish light output. If your pool experiences heavy use or debris exposure, increase cleaning frequency accordingly. You’ll maintain maximum illumination, enhance safety, and extend bulb lifespan by staying consistent with these cleaning schedules.
Can I Use a Smartphone App to Control My Pool Light Colors Remotely?
Yes, you can use a smartphone app for remote color control of your pool lights. You’ll need a Wi-Fi or Bluetooth-enabled controller compatible with your light’s brand. Download the manufacturer’s app, connect via wireless app integration, and follow setup instructions. Once configured, you’ll access color selection, brightness adjustments, and scheduling from anywhere with internet connectivity. Compatibility depends on your existing system’s voltage requirements and whether it supports the manufacturer’s smart control system.