


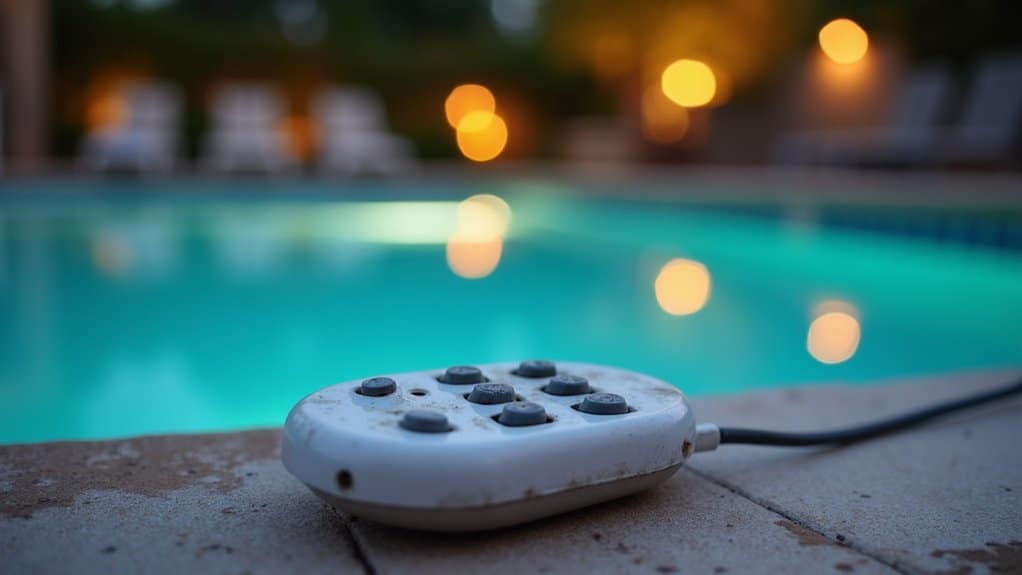
When your pool light remote won’t respond, start by replacing the CR2025 batteries and checking for corroded contacts. Next, verify the GFCI outlet hasn’t tripped and confirm the circuit breaker’s in the ON position. If power’s good, RF interference from Wi-Fi or nearby electronics may be blocking the signal close to 5 10 feet with direct line-of-sight and cycle the remote’s power button three times to re-sync. Below, you’ll find step-by-step fixes for every failure point.
Diagnose Why Your Pool Light Remote Isn’t Working
Several factors can prevent your pool light remote from responding, and RF signal interference tops the list. Cell phone signals, Wi-Fi networks, and nearby electronics disrupt RF transmission to your light’s receiver. The metal housing around pool fixtures further weakens signal range, compounding the problem. During pool light remote troubleshooting, you’ll want to rule out a pool light receiver issue by repositioning yourself closer to the fixture and testing from multiple angles.
If proximity doesn’t resolve it, suspect a remote pairing pool lights failure. Dead CR2025 batteries, corroded contacts, or a lost sync between transmitter and receiver all mimic signal problems. Check your remote’s indicator light if it doesn’t illuminate when pressing buttons, you’ve identified a power source failure requiring immediate attention. Before handling any electrical components near the fixture, always turn off power at the breaker box to ensure safe troubleshooting around water. Also note that illuminated switches in your electrical setup may send a constant current that blocks the remote’s signal from reaching the receiver, preventing any color-changing functionality.
If the indicator light confirms the remote is working but modes still won’t change, try cycling the light ON/OFF at the breaker to manually step through modes, then leave the light on for at least a minute once you find the desired setting.
Check the Power Source to Your Pool Light
Before troubleshooting the remote itself, you’ll want to confirm the pool light circuit is actually receiving power. Start by resetting any tripped circuit breaker, testing the GFCI outlet‘s reset function, and verifying the dedicated light switch is in the on position. These three checkpoints eliminate the most common power-side failures that mimic remote control malfunctions.
Reset Tripped Circuit Breaker
When your pool light remote fails to trigger any response, the circuit breaker feeding your pool equipment should be your first diagnostic checkpoint. A tripped breaker cuts power to your entire pool lighting control system, rendering the remote inoperative regardless of signal strength or battery condition.
When your pool light remote not working traces back to a tripped breaker, execute this reset tripped circuit breaker sequence:
- Locate the breaker panel on or near your equipment pad tripped breakers sit midway between on and off positions.
- Flip the breaker fully off, then wait 15 30 seconds for LED systems or 1 2 minutes for halogen fixtures.
- Return the breaker to on and immediately test remote functionality.
If the breaker re-trips, inspect for moisture intrusion or loose wiring before proceeding.
Test GFCI Outlet Reset
Press the TEST button first, then push RESET firmly until the green indicator illuminates. Verify your lights respond immediately. If you’re chasing an LED pool light remote problem, this step eliminates power delivery as the variable. Moisture, electrical shorts, or storm activity frequently trip GFCI protection. For recurring trips, replace the outlet before suspecting your pool automation remote. Test GFCI outlets several times yearly as preventive maintenance.
Verify Light Switch Position
Three separate control layers the dedicated light switch, circuit breaker, and GFCI outlet must all be in the “on” or “reset” state for your pool light to receive power, and a single overlooked switch kills the entire circuit.
Confirm your dedicated pool light switch is toggled on before escalating diagnostics. If the light’s unresponsive, perform a manual power cycle flip the switch off then on within 1-2 seconds, repeating 3-5 times to force an LED controller reset.
- Verify switch position confirm the toggle is physically in the “on” state, not mistaken for a GFCI reset button.
- Test output voltage use a multimeter to confirm 120V at the switch terminals when engaged.
- Inspect terminal connections loose wiring causes intermittent power delivery and erratic light behavior.
Reset the GFCI Outlet and Circuit Breaker
If your pool light remote isn’t responding after confirming the power source, you’ll want to troubleshoot the GFCI outlet and circuit breaker feeding the lighting circuit. Start by locating the GFCI outlet typically installed near pool equipment or in an exterior junction box and press the RESET button firmly until it clicks into position. If the outlet won’t reset, check your breaker panel for a tripped breaker on the pool lighting circuit and toggle it fully OFF then back ON before reattempting the GFCI reset.
Locate Your GFCI Outlet
Before troubleshooting your pool light remote, you’ll need to locate and reset the GFCI outlet that protects your lighting circuit. Per NEC 680.8B, these receptacles sit at least 6 feet from the pool’s inside wall. Look for the distinctive test/reset buttons and weatherproof enclosures that distinguish GFCI outlets from standard receptacles.
Check these common GFCI locations in your pool area:
- Junction box near the pool perimeter connects the GFCI circuit breaker to downstream outlets serving pool lights and fountains.
- Equipment room houses at least one GFCI-protected 125-volt, 15- or 20-ampere receptacle for servicing pumps and chlorinators.
- Landscape receptacle boxes positioned within 20 feet of the swimming pool wall, requiring GFCI protection per NEC 2023.
Press the Reset Button
Every GFCI outlet features two diagnostic buttons TEST and RESET on its faceplate, typically color-coded red (RESET) and black (TEST). If the outlet’s tripped, you’ll notice the RESET button protruding outward. On older units, worn lettering may obscure labeling, so identify buttons by position and color.
Before resetting, unplug all devices from the GFCI circuit and confirm the area’s dry. Press the RESET button firmly until you hear an audible click and it locks flush. If it won’t engage, press TEST first to manually trip, then re-press RESET. For stubborn buttons, wiggle slightly and retry.
Post-reset, verify functionality: press TEST the RESET button should pop out, cutting power. Press RESET again, then plug in a small appliance to confirm restoration. Reconnect pool light components individually to isolate trip-causing faults.
Check the Circuit Breaker
Two simultaneous failures pool lights and spa lights going dark at once point to a tripped GFCI circuit rather than individual bulb burnout. Locate your GFCI outlet on the automation panel or electrical panel near the pool area. A non-illuminated indicator confirms a tripped state.
Before resetting, verify these upstream power conditions:
- Confirm all circuit breakers controlling the GFCI outlet are in the ON position at your main breaker panel.
- Press the RESET button firmly on the GFCI outlet it should click and hold while the green indicator re-illuminates.
- Use a voltage tester if the reset won’t engage after breaker verification, indicating internal GFCI failure.
If the GFCI consistently refuses to reset despite confirmed breaker status, you’re dealing with component-level malfunction requiring professional replacement.
Bypass the Remote With Manual Switch Cycling
When your pool light remote fails to communicate with the receiver module, you can bypass it entirely by manual switch cycling toggling the wall switch that controls AC power to the 12VAC transformer in a specific on/off sequence to select colors or lighting modes directly.
Each cycle count maps to a predetermined function: 1 7 cycles activate color light shows (e.g., SAm® mode at 1 cycle, California Sunset at 6), while 8 12 cycles lock in fixed colors. You won’t see illumination during the switching sequence expect a momentary white flash on the final power-on, followed by your selected mode. Once active, hold your selection for 10 seconds to save it. The light recalls this mode on subsequent power-ups automatically.
Why RF Interference Blocks Your Pool Light Remote
Your pool light’s metal fixture acts as an RF reflector, absorbing or deflecting the remote’s low-power 433 MHz or 2.4 GHz signal before it reaches the receiver. Competing wireless sources Wi-Fi routers, Bluetooth devices, microwave ovens, and garage door openers occupy the same ISM bands, creating signal degradation that causes intermittent command failures, flickering, or complete non-response. To isolate the interference source, you’ll need to systematically power down nearby 2.4 GHz devices and test remote functionality at reduced distances with a clear line of sight to the receiver.
Metal Fixtures Weaken Signals
Because metal pool light housings act as RF barriers, they block or attenuate the signal your remote transmits to the internal receiver. Dense metal enclosures reflect and absorb low-power RF waves, reducing effective transmission range to under 20 feet or eliminating it entirely depending on your pool’s configuration.
You’ll typically observe these failure patterns:
- Sporadic mode changes RF signals penetrate intermittently through metal, causing inconsistent command execution at the receiver.
- Range degradation Your remote only triggers responses within 10-20 feet, confirming metal-induced signal attenuation.
- Complete signal loss Metal housing prevents any line-of-sight path to the receiver mounted at the fixture’s back.
To bypass this, aim your remote directly at the light’s lens center underwater this circumvents the metal obstruction 99% of the time.
Competing Wireless Signal Sources
Although metal fixtures represent a physical barrier to RF transmission, competing wireless signals pose an equally disruptive threat by flooding the electromagnetic spectrum your pool light remote relies on. Wi-Fi routers and Bluetooth devices operating at 2.4 GHz directly overlap with ISM-band RF remotes, causing signal degradation and dropped commands. Microwave ovens emit broadband electromagnetic noise at the same frequency during operation, triggering intermittent command failures.
You’ll also encounter congestion from garage door openers and alarm systems crowding the 315 MHz and 433 MHz bands. Household electronics fluorescent lights, LED drivers, and switching power supplies generate EMI that further compromises remote range. To restore reliable control, reposition Wi-Fi routers, power off nearby Bluetooth devices, and isolate poorly shielded electronics from your pool lighting system’s receiver.
Move the Remote Closer to the Pool Light Fixture
Most pool light remotes operate within a 20 50 foot effective range, but signal degradation from obstructions, humidity, and RF interference can cut that distance considerably. You’ll need to reduce the transmission path to restore reliable communication between your remote and the fixture’s control receiver.
Follow these positioning protocols for ideal signal acquisition:
- Close the gap to 5 10 feet from the fixture, maintaining direct line-of-sight with no deck furniture, equipment, or pool covers obstructing the RF/IR path.
- Hold the remote at chest height, aimed directly at the fixture don’t angle it beyond 45 degrees off-axis.
- Cycle the remote’s power button three times to reset the connection, then test from your current position.
Log successful control distances to establish a baseline reception pattern for future diagnostics.
Use a Waterproof Bag to Control Pool Lights Underwater
When closing the gap between you and the fixture still doesn’t resolve signal dropout especially if you’re already in the pool a clear vinyl waterproof bag rated IPX8 lets you take your RF remote underwater and control your pool lights at point-blank range.
These bags feature airtight zip-lock seals rated for submersion up to 10 meters and accommodate standard RF remotes up to 15cm x 8cm. They’re compatible with 433MHz RF remotes from brands like POOLHACKER and Maxsure, maintaining a 10-15 meter signal range through the vinyl material.
Insert your remote, expel excess air, and seal the zipper before submerging. Test seal integrity above water first. RF transmission penetrates water instantly, activating lights without surface interference. Note: IR remotes won’t work RF only. Inspect seals daily and replace bags after six months of heavy use.
Route the Remote Signal Through Your Junction Box
If your RF remote’s signal can’t reach the lighting controller because of distance, thick pool walls, or electromagnetic interference from nearby equipment, you can reroute the command path by installing an RF relay module inside your wet-location junction box.
Your NEC Article 680-compliant junction box already houses hot, neutral, and grounding conductors making it the ideal signal relay point. Follow this sequence:
- Mount the RF relay module inside the junction box, connecting its input leads to the hot (black/red) and neutral (white) bus bars using wire nuts per local codes.
- Pair the relay module to your remote’s frequency, ensuring it retransmits commands to the lighting controller downstream.
- Seal all entry points with watertight connectors and reseal the junction box gasket to prevent water intrusion.
Re-Sync Your Remote to Your Pool Light
Should your pool light ignore every command from the remote despite fresh batteries and a clear signal path the root cause likely traces back to a broken sync between the transmitter and the controller’s stored pairing profile. You’ll need to initiate a fresh RF handshake between devices.
Press and hold the match key on your LC01 controller until the LED indicator turns white and the fixture begins blinking red slowly this confirms match mode activation. You’ve got a 10-second window to press the power key on your TW4 touch panel or R8-1 remote. One press is sufficient. Successful pairing triggers an RGB jumping mode on the fixture, replacing the red blink pattern. If the window lapses, repeat the sequence immediately. This methodology applies consistently across multi-color LED pool light models.
Inspect the Bulb, Wiring, or Call a Professional
Pull the fixture from its niche and examine the bulb for blackened filament ends, cracked glass, or a visibly broken element these confirm a burned-out unit that’s no longer serviceable. Swap it with a known-working, compatible replacement to isolate the fault.
If the bulb tests fine, trace the wiring path and check these critical points:
- Junction box connections tighten any loose terminals and inspect for corrosion that’s degrading conductivity.
- GFCI outlet status reset any tripped breaker or ground-fault interrupter on the dedicated pool lighting circuit.
- Fixture housing integrity look for water intrusion causing intermittent shorts or repeated GFCI trips.
Use a multimeter to verify voltage at the fixture. If you lack experience with electrical diagnostics, call a licensed electrician for safe resolution.
Frequently Asked Questions
Can Pool Light Remotes Work With Different Brands of Pool Lights?
You generally can’t use pool light remotes across different brands. Proprietary signaling protocols like Pentair’s Color Sync or Champlain Plastics’ Multi-Color LED system prevent cross-brand compatibility. There’s no universal standard, and unlike grow light ecosystems, adapter solutions don’t exist for pool lights. If you’re troubleshooting a non-responsive remote, first verify you’ve got a brand-matched unit. Use tools like NoMixGreen’s AI compatibility checker to confirm exact model fits before replacing hardware.
How Often Should Pool Light Remote Batteries Be Replaced?
You should replace your pool light remote batteries when the green LED fails to illuminate for at least 1 second after releasing a button that’s your primary depletion indicator. Most remotes use A23 12V or AA batteries, and there’s no fixed replacement interval. Instead, perform regular LED status checks to assess voltage levels. If you’re storing equipment longer than one month, remove batteries entirely to prevent corrosion and discharge degradation.
Do Pool Light Remotes Work in Saltwater Pools?
Yes, pool light remotes work in saltwater pools without compatibility issues. Most residential saltwater systems operate at around 3,000 ppm salt levels well below the 25,000-35,000 ppm ocean-level thresholds that trigger manufacturer warnings. You’ll find wireless remotes controlling multi-color LEDs from up to 100 feet, even in saltwater environments. Make certain your submersible lights carry an IP68 waterproof rating with upgraded rubber seals, and you’ll maintain reliable remote-to-receiver signal pairing in saltwater conditions.
Can Smartphone Apps Permanently Replace a Lost Pool Light Remote?
Yes, you can permanently replace your lost remote with a smartphone app if your pool lights have Bluetooth-enabled receivers or compatible IR drivers. You’ll download the app, enable Bluetooth, and pair it with your light’s wireless module. Apps like universal LED controllers support multiple brands and offer full functionality power, color, and brightness control. However, you can’t use app-based control if your fixtures lack wireless capability, so verify hardware compatibility first.
Will Extreme Heat or Cold Damage a Pool Light Remote?
Yes, extreme heat poses the greatest risk to your pool light remote. Temperatures exceeding 110°F degrade internal electronics, accelerating component failure and reducing signal reliability. Cold’s less documented, though battery-powered remotes can lose range in freezing conditions. You’ll want to store your remote away from direct sun and heat sources position drivers up to 80 feet from high-heat zones. IP66-rated units with aluminum heat sinks resist thermal degradation best, extending your remote’s operational lifespan considerably.