

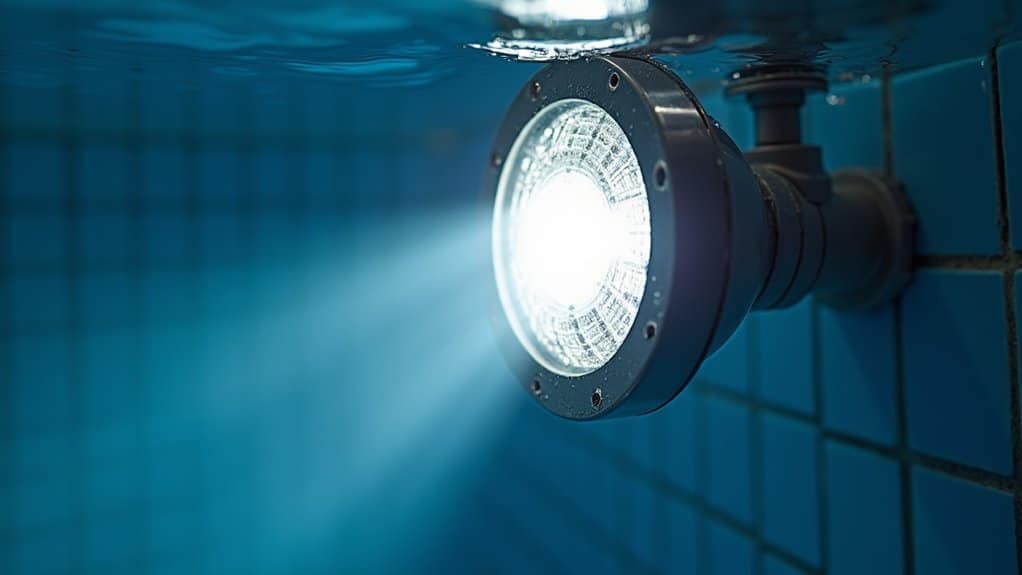
Most pool light failures fall into a few diagnosable categories: flickering from loose connections or faulty LED drivers, complete outages caused by tripped GFCI breakers or water-shorted components, and color shifts driven by phosphor degradation or moisture breach. You’ll want to start by confirming circuit breaker status, testing voltage output at the transformer, and inspecting fixture seals for intrusion. Pool light troubleshooting through each section below walks you through the systematic diagnostics and NEC-compliant fixes for every common issue.
Why Is Your Pool Light Flickering?
When your pool light starts flickering, the issue typically traces back to one of five diagnostic categories: loose connections, faulty wiring, driver or transformer failure, compromised seals, or voltage fluctuations. Each category requires a distinct diagnostic approach to isolate the root cause.
Loose connections at the junction box or fixture create intermittent power flow. Corroded or damaged wiring disrupts steady current delivery. Faulty LED drivers produce unstable output voltage, while compromised gaskets allow water ingress that damages internal components. Voltage fluctuations from high-draw appliances on shared circuits compound these pool light problems further. Beyond operational concerns, persistent flickering at low frequencies can cause eye fatigue and migraines, making prompt diagnosis essential for both equipment longevity and swimmer comfort.
You’ll want to systematically check each category starting with connections and working through wiring, drivers, seals, and supply voltage to pinpoint the exact failure point before attempting repairs. Ignoring flickering and delaying investigation can escalate the situation into serious electrical hazards, so prompt action is always recommended.
What Causes a Complete Pool Light Outage?
Unlike flickering which signals intermittent faults a complete pool light outage points to a total break in the electrical circuit. You’ll need to check your circuit breaker first; overloads or ground faults trip breakers, cutting all power. Per NEC requirements, GFCI outlets protecting pool circuits detect imbalances as low as 4 6 milliamperes repeated tripping signals deeper wiring or fixture faults.
This pool light troubleshooting guide recommends inspecting connections next. Corroded wiring from chemical exposure, frayed conductors, or loose terminals create open circuits that stop current flow entirely. Water intrusion through cracked housings or failed cord seals short-circuits LED components, often requiring full fixture replacement. Transformer malfunctions in low-voltage systems especially across long cable runs also cause complete outages you shouldn’t overlook. Using a multimeter on the continuity setting helps confirm whether a bulb has burned out before replacing the entire fixture.
How Do You Know If the Bulb Is Burned Out?
You can confirm a burned-out pool light bulb by removing it from the fixture and testing it in a known working socket or checking for continuity with a multimeter set to the ohms setting an open circuit reading confirms filament failure. Visually inspect the filament for breaks, melting, or blackened deposits on the glass envelope, which indicate end-of-life burnout per NEC Article 680 fixture maintenance standards. If burnout is confirmed, you should replace the halogen bulb with a compatible LED retrofit unit, which offers longer service life and reduced thermal degradation inside the wet-niche housing.
Test Bulb Separately
If your pool light has gone dark and you’ve already confirmed power is reaching the fixture, the next logical diagnostic step is isolating the bulb itself. To test bulb separately, kill power at the breaker, remove the bulb from its housing, and install it into a standard household lamp. If it illuminates, your swimming pool light repair involves the fixture not the bulb. If the bulb does not light up in the lamp, it’s time to consider other possibilities, such as a faulty remote or wiring issue. Familiarizing yourself with pool light remote troubleshooting tips can help identify connectivity problems or configuration errors.
| Test Method | Procedure | Result Interpretation |
|---|---|---|
| Household Lamp Test | Insert bulb into standard fixture | No light = bulb failure |
| Continuity Test | Meter across black/white wires | 3 20 ohms = good bulb |
| Visual Inspection | Examine filament and glass | Darkened envelope = burned out |
Document your findings before proceeding with replacement.
Check Filament Integrity
Three telltale signs confirm a burned-out pool bulb before you ever reach for a multimeter.
- Darkened or blackened glass tungsten evaporation deposits a visible film inside the envelope, signaling filament failure you can’t miss.
- Broken filament fragments at the base remove the fixture from its niche and inspect through the lens for fractured wire segments.
- Open-circuit continuity reading classified as a Class 3 fault, this confirms zero electrical path through the lamp.
During pool light troubleshooting, don’t confuse burnout with surface obstruction. Algae buildup, calcium deposits, or corroded socket contacts simulate the same no-output symptom. Inspect gaskets for tears allowing water intrusion, which corrodes filaments prematurely and triggers GFCI trips.
Replace With LED
Five distinct failure signatures tell you a pool bulb has burned out and it’s time to replace it with an LED upgrade. Driver circuit failure accounts for 25% of cases, while SMD-type LED failures represent 63% based on 22-bulb diagnostic analysis. Lost wire connections create open circuits, and resin cracking pulls conductors off contact points, triggering arcing hazards.
You’ll need to inspect your pool light wiring for corrosion or water intrusion that accelerates burnout. Cheap LEDs typically fail within one year, so you should select durable, brand-rated replacements. If a discolored or cloudy lens accompanies the failure, confirm no fixture damage exists before installing. Verify transformer compatibility and GFCI function post-installation to guarantee code-compliant operation.
Is Your Pool Light Fixture Leaking Water?
How quickly can a compromised pool light seal turn a minor nuisance into a major structural and electrical hazard? Among critical pool lighting issues, fixture leaks rank highest for damage potential. You’ll identify a leak when your water level consistently drops to light niche elevation, exceeding normal evaporation rates confirmed through a bucket test.
Root causes include failed gaskets, cracked niches, and deteriorated conduit seals behind the fixture.
- You’re losing water daily and every gallon compromises your pool’s structural integrity.
- Corrosion is silently advancing degrading electrical connections you can’t see.
- GFCI trips signal danger water has reached energized components.
Perform dye testing around the niche perimeter to isolate the leak origin before attempting gasket replacement or conduit resealing.
What If No Power Reaches the Pool Light?
When your pool light fails to illuminate entirely, systematic diagnosis of the power delivery chain from breaker panel to fixture socket isolates the fault point efficiently.
First, confirm the circuit breaker hasn’t tripped to its idle position. Reset it by switching fully off, then back on. Next, check the GFCI outlet press the reset button to restore power if it’s tripped due to current leakage detection. Verify your dedicated pool light switch is positioned on.
For low-voltage systems, test the transformer using a multimeter at the fixture socket. A 0-volt reading indicates a dead fixture. Transformers with 15V wiretaps support longer cable runs. If you suspect damaged wiring within your pool electrical system, engage a licensed electrician improper wiring poses serious safety risks.
Why Are Your LED Pool Lights Changing Color?
Why do your LED pool lights drift from their original color spectrum without any change to your controller settings? The root cause typically traces to internal component degradation rather than control system failure. During led pool light troubleshooting, you’ll find phosphor coating breakdown shifts output toward blue (curling) or yellow (delamination under heat). Water infiltration compromises circuit integrity, altering spectral output unpredictably.
Three primary failure modes drive color shift:
- Thermal dissipation failure inadequate heat management pushes diodes beyond rated temperature thresholds, accelerating phosphor degradation cycles.
- Moisture breach sealed fixture design failures allow water penetration, contaminating internal components and disrupting electrical connections.
- Material degradation low-quality LED diodes deteriorate faster, producing visible color temperature drift well before expected end-of-life.
Should You DIY or Call a Pool Light Pro?
Where exactly should you draw the line between a confident DIY fix and a call to a licensed pool electrician? If you’re resetting a tripped GFCI outlet, replacing a burned-out bulb, or cleaning a lens, you can handle basic pool maintenance troubleshooting safely. These tasks don’t require specialized tools or NEC Article 680 expertise.
However, you should call a professional when dealing with fixture resealing, complex wiring repairs, or moisture intrusion. Improper handling risks electrical shock, short circuits, and voided warranties. Professional repairs cost $150 $500, depending on scope, but they guarantee code-compliant sealing and thorough diagnostics. You’ll save $75 $150 per hour on simple fixes, but complex electrical work near water demands certified precision every time.
Frequently Asked Questions
How Often Should Pool Lights Be Replaced for Optimal Performance?
You should replace incandescent pool lights every 1 3 years (800 1,000 hours), halogen lights every 2 5 years (3,000 5,000 hours), and LED lights after 25,000 50,000 hours roughly a decade. Watch for diagnostic indicators like dimming, flickering, color shifts, or water infiltration, as these signal immediate replacement need. Corrosion from imbalanced water chemistry accelerates wear, so you’ll want to factor in maintenance quality and actual usage hours when determining your ideal replacement schedule.
Can Saltwater Pools Cause Faster Pool Light Deterioration?
Yes, saltwater pools accelerate pool light deterioration considerably. The salt environment drives galvanic corrosion between dissimilar metals in your fixtures, while high chlorine output degrades seals, gaskets, and internal components faster. You’ll notice corroded connections disrupting electrical flow, moisture infiltration causing short circuits, and salt residue buildup reducing brightness. To counteract this, you should install zinc anodes, monitor metal levels weekly, and inspect fixture seals regularly to extend your lighting system’s lifespan.
What Safety Certifications Should You Look for in Pool Lights?
You should look for UL 676 certification, which covers underwater luminaires and submersible junction boxes. Verify the ETL mark for North American safety compliance and guarantee fixtures meet NEC Article 680 wiring requirements. For international standards, check for CE marking, IP68 waterproof rating, and VDE certification. You’ll also want GFCI protection per code and UL 379-listed transformers within required distances. RoHS compliance guarantees that hazardous substance restrictions are met.
Are Solar-Powered Pool Lights a Reliable Alternative to Wired Fixtures?
Yes, you’ll find solar-powered pool lights are a reliable alternative. They eliminate the risk of electric shock drowning by operating on low-voltage DC instead of AC current. You won’t tap your electrical bill since they’re entirely solar-charged, delivering 6 12 hours of runtime per charge cycle. Look for IP68-rated units they’ll withstand full submersion. You’ll avoid wiring faults, transformer failures, and corrosion issues that commonly trigger troubleshooting in traditional wired fixtures.
How Does Water Temperature Affect Pool Light Lifespan and Efficiency?
Higher water temperatures directly shorten your pool light’s lifespan. Running an LED at 95°C instead of 85°C cuts its life from 50,000 to 25,000 hours. You’ll also notice decreased light output and efficiency as temperatures climb. Incandescent and halogen bulbs fare worse they generate heat that compounds the problem. A 10°C temperature drop can double your LED’s lifespan, so you should monitor thermal conditions and maintain balanced water chemistry to prevent accelerated degradation.