
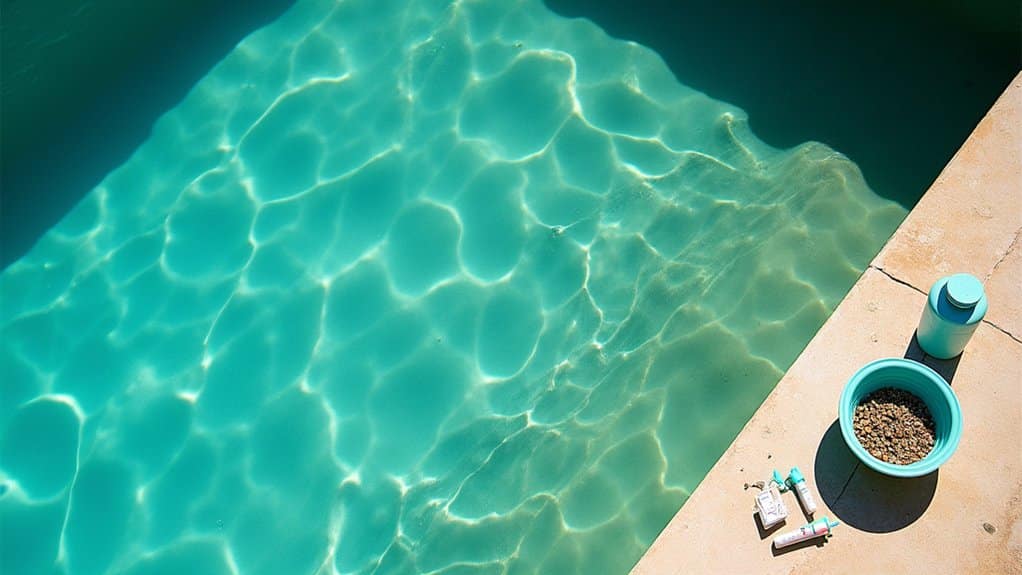
You’ll need to systematically diagnose your pool light issue by checking three key areas first. Start by resetting your circuit breaker flip it fully off, then back on. Next, inspect the bulb for burnout using a multimeter’s continuity setting. Then examine the fixture housing, gasket, and cord seal for water damage or corrosion. If these steps don’t restore power, you’ve likely got wiring faults or deeper electrical problems requiring further investigation. Understanding why your pool light isn’t working helps you troubleshoot efficiently.
Electrical Power Issues and Circuit Breaker Problems
Before you inspect your pool light fixture, you’ll need to verify that power’s actually reaching it. Start by locating your circuit breaker panel and checking the breaker controlling your pool light. You’re looking for overloaded breakers or tripped safety switches that sit in an idle position between on and off settings.
Reset any tripped breaker by flipping it completely off, then switching it back on. If the breaker immediately springs back to the idle position, it likely needs replacement and requires professional attention. Mark the breaker that handles your light’s load before proceeding with further checks to avoid confusion during troubleshooting.
Next, inspect your GFCI outlet for tripped status. Press the reset button to restore power. If your light turns back on, you’ve resolved a safety interruption rather than a fixture failure. If the GFCI won’t reset, deeper electrical problems exist in your wiring or fixture itself. Repeated tripping signals an underlying fault that needs professional inspection to prevent electrical hazards. Always turn off power at the breaker box before accessing any pool light fixture to ensure your safety while troubleshooting.
Identifying Burned-Out Bulbs and Fixture Failures
Once you’ve confirmed that power’s reaching your pool light, the next step is examining whether the bulb itself has failed or if the fixture is damaged.
Start by disconnecting power and removing the fixture from its niche. Look for visible signs: dim or flickering illumination, filament breakage in halogen bulbs, discolored LEDs, or sooty markings inside the glass. Use a multimeter to check continuity across the bulb no continuity means it’s burned out.
Use a multimeter to check bulb continuity no continuity indicates a burned-out bulb requiring replacement.
Inspect the fixture housing for fixture heat damage like melted plastic or scorched areas, which indicate overheating rather than simple bulb failure. Check the gasket and lens seal for cracks allowing water infiltration. Water intrusion inside the fixture will short out the light and cause premature failure. Examine socket contacts for corrosion or looseness. Regular maintenance of these components can prevent many common fixture failures. Consider switching to LED bulbs for extended longevity and improved energy efficiency compared to traditional halogen options.
If you’ve replaced the bulb without improvement, suspect fixture failure. Frequent replacements often signal bulb compatibility issues or underlying electrical problems requiring professional assessment.
Water Intrusion and Moisture Damage
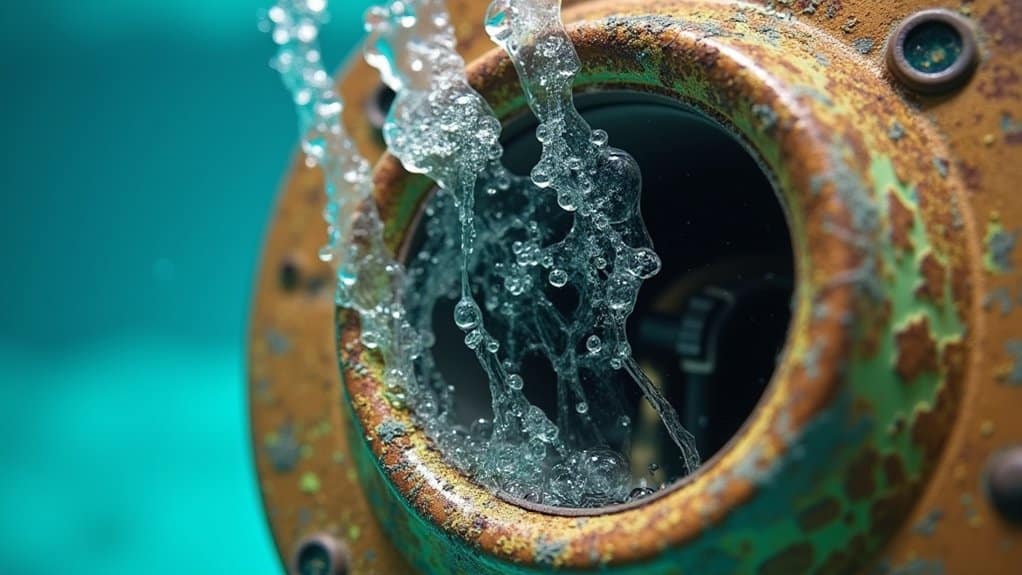
While a burned-out bulb or faulty fixture housing can cause your pool light to fail, water intrusion represents one of the most insidious and damaging problems you’ll encounter. Moisture penetration compromises electrical contacts and accelerates corrosion, often requiring complete fixture replacement rather than simple repairs. If you notice recurring water intrusion issues, this indicates a more significant problem that demands professional attention rather than DIY solutions.
| Intrusion Source | Warning Signs | Consequences |
|---|---|---|
| Deteriorated gaskets | Condensation, fogging | Short circuits |
| Cracked housing | Rust, mineral deposits | Electrical failure |
| Cord seal failures | Sloshing sounds | Component corrosion |
| Poor installation | Water level drops | Permanent seal degradation |
| Substandard materials | Discoloration | Electric shock risk |
Proper installation techniques and high-quality fixtures vastly reduce moisture risks. Check your warranty information before attempting repairs. Aging pool lights become increasingly susceptible to seal failure and water infiltration over time, making preventive maintenance essential. Excessive oxidizing or reducing ions in pool water can destroy the protective stainless steel layer, accelerating corrosion and seal failure. Regular inspections catch seal deterioration early, preventing costly damage to both the fixture and surrounding pool structure.
Wiring and Connection Faults
Beyond the seal failures that allow moisture into your fixture, the electrical pathways themselves can deteriorate and interrupt power delivery to your pool light. You’ll encounter damaged wiring, corrosion from pool chemicals, and loose connections that disrupt current flow. Frayed or exposed wire sections increase resistance, causing dimming or complete failure. Check your junction box integrity regularly loose wire nuts and terminal screws contribute to flickering and heat buildup that can melt insulation. Vibration and age loosen connections over time. When breakers trip repeatedly, suspect short-circuiting from wiring damage. Professional wire tracing helps identify faults in both visible and underground cables. Transformers reduce electrical voltage to safe levels, protecting your system from power surges that could damage wiring insulation. Before attempting any electrical diagnostics, shut off power at the breaker box to ensure your safety while working near water and electrical components. Use a multimeter to test for voltage at the light fixture to pinpoint whether the problem originates from the power source or within the fixture itself. Secure all connections firmly and replace corroded connectors promptly to maintain reliable system operation and prevent costly repairs.
Testing Voltage With a Multimeter
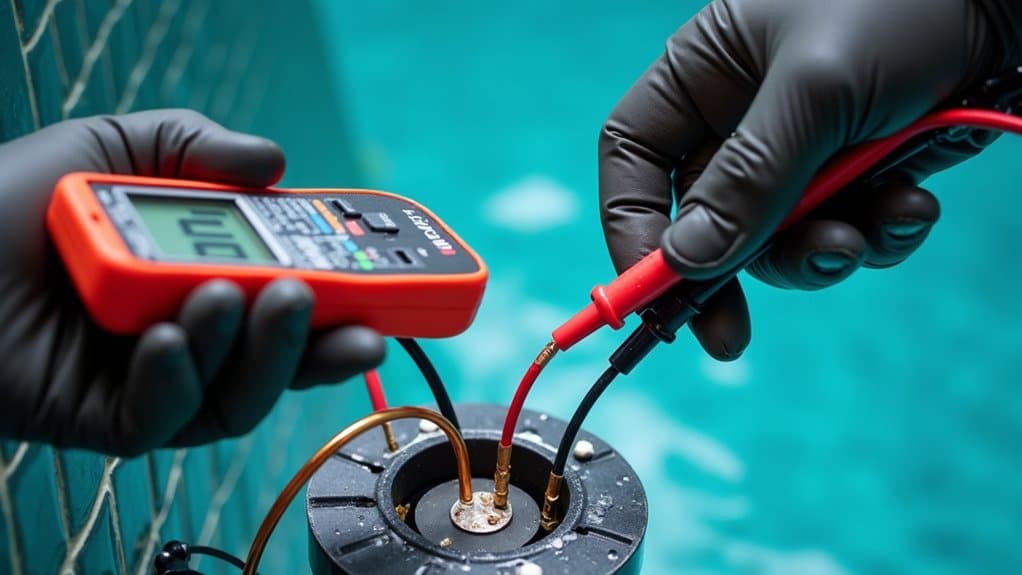
How do you pinpoint whether your pool light’s electrical system is delivering power? You’ll use a multimeter set to voltage mode to measure at critical points: the circuit breaker, junction box, and transformer terminals.
Start by checking voltage between the hot (black) and neutral (white) wires at your breaker you should read 120V or 12V depending on your system type. If the transformer’s output reads zero volts, it’s likely defective.
Next, switch your multimeter to continuity or ohm mode to test for broken terminals and open circuit issues. Place leads on the black and white wires serving your pool light. Near-zero resistance indicates a complete circuit; infinite resistance signals a break or faulty connection requiring investigation. After voltage and continuity tests pass, a good bulb reads 3-20 ohms when tested between the black and white wires of the light cord.
Checking for Corrosion and Environmental Damage
Once you’ve confirmed your pool light receives adequate voltage, you’ll need to inspect for corrosion and environmental damage two of the most common culprits behind light failure. Check the light housing, lens, and trim rings for rust streaks, pitting, or discoloration. Remove the fixture (power off) and examine internal surfaces, wires, and contacts for green, white, or black deposits indicating corrosion. Look for moisture or cloudiness inside the lens, signaling waterproofing failure. Inspect junction boxes and connections behind escutcheon plates for salt deposits or deteriorating connectors. Corroded wiring causes dimming, flickering, or complete failure. Address galvanic corrosion prevention through proper grounding techniques to minimize metallic component damage. Traditional stainless steel pool lights remain vulnerable to the corrosive environment of swimming pools, making material selection crucial for long-term durability. Water intrusion inside the fixture can cause internal metal parts to corrode, leading to short circuits and accelerated deterioration. Schedule professional maintenance checks annually to catch corrosion issues early before they compromise your pool light’s performance. Replace severely corroded fixtures and gaskets; clean minor corrosion with pool-approved cleaners and reseal using waterproof sealant.
Resetting GFCI Outlets and Circuit Breakers
You’ll find that most pool light failures trace back to tripped GFCI outlets or circuit breakers, which are safety devices designed to cut power when they detect ground faults. To reset a GFCI outlet, you’ll need to locate the reset button on its faceplate, press it until it clicks, and confirm power restoration by testing a connected device. If you’re resetting a circuit breaker instead, you’ll switch it fully to the off position and then back to on though persistent tripping after reset signals an underlying electrical issue that requires professional diagnosis.
Understanding GFCI Protection
Because water conducts electricity, the National Electrical Code requires Ground Fault Circuit Interrupter (GFCI) protection on all pool light circuits and nearby outlets. You’ll find GFCIs either in your circuit breaker panel or as outlets near your pool equipment. These devices detect current imbalances as low as 4-6 milliamperes and cut power within milliseconds, preventing electrocution. You should perform periodic GFCI testing monthly by pressing the “TEST” button this simulates a fault and confirms functionality. If power cuts off, your GFCI works properly. Resetting restores normal operation by pressing “RESET.” Code compliance requirements mandate that you maintain accessible, labeled GFCIs and document test results. If your GFCI won’t reset or trips repeatedly without water contact, you’ll need professional inspection to identify underlying wiring or equipment faults.
Manual Reset Procedures
Now that you understand how GFCI protection works, the next step is learning how to restore power when your pool light trips the circuit. Start by turning off power at the main breaker to eliminate electrical safety hazards. Locate your GFCI outlet or dedicated pool light breaker, then inspect for moisture or damage while diagnosing outlet failures. For GFCI outlets, press the RESET button to restore power. For circuit breakers, switch the handle fully OFF, then back ON. If your outlet or breaker won’t reset, trips repeatedly, or shows buzzing or overheating, stop immediately and contact a licensed electrician. Persistent failures indicate underlying wiring faults or water intrusion requiring professional assessment. Never force a stuck breaker or attempt repairs beyond basic resets.
Upgrading to LED Pool Lights
If your pool light’s troubleshooting efforts reveal that replacement rather than repair is necessary, upgrading to LED fixtures offers substantial long-term benefits. LED lights consume 75 80% less energy than traditional halogen bulbs, dramatically reducing operational costs while delivering superior brightness and uniform light distribution.
You’ll enjoy extended lifespan over 10 years versus 1 2 years for halogen minimizing replacement frequency and maintenance expenses. Smart LED systems enable customized lighting control through wireless integration with home automation platforms, allowing you to adjust color and intensity remotely.
Most LED fixtures retrofit existing pool niches using standard mounting brackets, simplifying installation with your current wiring. Check compatibility with your pool control system and consider energy incentives available in your region. Professional installation guarantees proper electrical bonding and waterproof connections, maximizing system longevity and performance.
Preventive Maintenance and Long-Term Solutions
You’ll extend your pool light’s lifespan by upgrading to LED technology, which consumes less power and generates fewer heat-related failures than traditional bulbs. Schedule regular inspections every season to catch electrical corrosion, worn seals, and lens damage before they compromise your fixture’s performance. Investing in quality gaskets and O-rings during maintenance prevents water intrusion, the primary cause of fixture failure and costly replacements.
Upgrade to LED Technology
Why do pool owners continue replacing traditional bulbs every season when LED technology delivers a fundamentally different approach to pool lighting?
Upgrading to LEDs eliminates the constant maintenance cycle that drains your time and budget. You’ll experience up to 50,000 hours of reliable operation roughly a decade without replacements. LEDs consume 90% less energy than incandescent bulbs, considerably reducing your electricity costs.
Modern LED systems incorporate smart controls and automation integration, allowing you to adjust brightness and colors wirelessly through your smartphone or home automation platform. These systems often include diagnostic functions that alert you to potential issues before complete failure occurs.
The initial investment pays for itself through reduced energy bills and labor costs. You’ll minimize pool surface damage from frequent fixture access while maintaining consistent brightness and compliance with safety regulations. LED technology represents genuine, long-term prevention.
Schedule Regular Inspections
How often should you inspect your pool lighting system to catch problems before they become expensive failures? You’ll want to schedule annual professional inspections before your swimming season begins. If you’ve noticed wear or recent storm damage, increase your scheduling frequency to every few months.
Professional inspections identify electrical hazards and verify code compliance that visual checks can’t catch. During these visits, technicians examine bulbs for moisture and discoloration, assess fixtures for cracks or corrosion, verify proper grounding, and test GFCI outlets.
Between professional visits, perform routine DIY checks cleaning lenses, inspecting connections, and monitoring for water intrusion. Documenting all inspections and repairs protects your warranty and provides compliance records.
This systematic approach prevents costly repairs, extends component lifespan, and maintains electrical safety in your wet environment.
Invest in Quality Seals
Because water intrusion represents the primary threat to pool light integrity, investing in high-quality seals becomes your most cost-effective preventive measure. Premium silicone or high-grade rubber seals resist pool chemicals, UV exposure, and temperature fluctuations far better than budget alternatives, preventing premature cracking and brittleness.
| Seal Quality | Expected Lifespan | Maintenance Cost |
|---|---|---|
| Low-grade rubber | 1-2 years | High (frequent replacement) |
| Standard gaskets | 2-4 years | Moderate (regular upkeep) |
| Premium silicone | 5+ years | Low (minimal intervention) |
Routine seal inspection catches deterioration early, protecting your fixture’s electrical components from corrosion and shorts. You’ll extend LED fixture longevity while maintaining warranty compliance. Proper torquing and manufacturer-compatible gaskets guarantee watertight closure, supporting seal deterioration prevention through professional-grade installation practices.
Frequently Asked Questions
Can I Safely Replace My Pool Light Bulb Myself, or Should I Hire a Professional?
You can safely replace your pool light bulb yourself if you follow strict electrical safety considerations. First, turn off all power and verify the GFCI outlet’s non-live status with a voltage tester. Our DIY installation tips include: keep everything dry, unscrew the fixture carefully, swap the bulb, inspect gaskets for damage, and reseal the housing. However, if you’re uncertain about wiring, notice corrosion, or lack proper tools, hire a professional immediately.
How Often Should I Inspect My Pool Lighting System to Prevent Unexpected Failures?
You should schedule regular maintenance checks seasonally before swimming begins, then conduct professional inspections annually at minimum. For residential pools with heavy usage or older equipment, you’ll want semi-annual inspections. Commercial or high-demand systems require quarterly assessments. Additionally, you’ll need inspections after storms or power surges. Professional inspections verify electrical safety compliance and catch corrosion early, preventing costly failures and ensuring your pool operates safely year-round.
What Is the Average Cost Difference Between Halogen and LED Pool Light Replacements?
You’ll initially pay $50 $200 more per LED fixture, but you’ll recoup that investment through long-term cost savings. LED’s energy efficiency considerations dramatically reduce your annual operating expenses by $50 $150 per light. Since LEDs last 30,000 50,000 hours versus halogen’s 1,000 4,000 hours, you’ll minimize replacement costs. Over five to seven years, you’ll save hundreds of dollars per light when accounting for energy consumption and maintenance frequency, making LEDs the economically superior choice.
Will Upgrading My Pool Lights Affect My Electricity Bill or Monthly Utility Costs?
Yes, upgrading to LED pool lights’ll greatly reduce your electricity bill. You’ll save 75 90% on lighting energy consumption factors compared to halogen bulbs. While individual savings may seem modest monthly, they accumulate substantially yearly. Consider replacement cost comparisons too LEDs last 5 15 times longer, eliminating frequent bulb purchases. Your payback period typically ranges 2 3 years through combined energy and maintenance savings, making LED upgrades financially practical for most pool owners.
Can Underwater Pool Lights Be Safely Installed in Older Pools Without Rewiring?
No, you shouldn’t install underwater pool lights in older pools without rewiring. Retrofitting pool lighting in aging installations typically requires rewiring because your existing wiring’s likely corroded, inadequately grounded, or lacking proper GFCI protection. You’ll need ensuring proper wiring connections meet current NEC code before installation. Licensed electricians must inspect your entire electrical system including bonding, grounding continuity, and junction box condition to guarantee safety compliance and prevent electrocution hazards.