
If your pool valve won’t turn, start by identifying whether it’s manual or automatic. Check the actuator’s toggle switch, then compare the commanded position against the valve’s actual position. Listen for motor hum: silence means electrical failure, while humming without rotation signals jammed gears. Never force a stuck valve, resistance means a problem. Isolate the valve, relieve pressure, clear debris, and lubricate seals. Below, you’ll find each step broken down clearly.
Key Takeaways
- Identify your valve type first: manual valves have hand-turned handles, while automatic valves have a boxy actuator with wiring on top.
- Compare the controller’s commanded position to the valve’s actual handle position to separate control issues from mechanical lockups.
- Listen during a commanded change: a silent actuator signals electrical failure, while humming without rotation indicates jammed gears or bind.
- For manual valves, loosen the thumb screw, lift the handle upward, then gently turn to check for free movement versus resistance.
- Never force a stuck valve; resistance signals a jam, misalignment, or worn internal parts like O-rings and seals that need replacement.
Why Your Pool Valve Won’t Turn

Your pool valve won’t turn because of one of five issues: debris or obstruction lodged in the valve body, a cracked or misaligned handle assembly, a stuck diverter or internal wear, actuator failure on automatic valves, or incorrect installation orientation.
Check the valve body first for obstructions blocking normal movement. Inspect the handle for cracks, loose screws, or misalignment that prevents rotation. A stuck pool valve often has a jammed diverter or worn internal parts resisting smooth motion. On automatic valves, suspect a damaged motor or gears. Finally, confirm the valve was mounted correctly after service, since wrong orientation makes it appear seized.
Manual or Automatic: Which Valve Do You Have?
Before you troubleshoot anything, you need to know which valve you’re dealing with. Manual valves have a handle you turn by hand, often with a thumb screw you loosen to disengage the internal gear. Automatic valves have an actuator mounted on top, a motorized housing with wiring, a toggle switch, and no hand-turned handle.
Identifying Manual Valves
A manual valve has a handle you turn by hand, with no motor, wiring, or actuator housing bolted on top. This design is what you need to identify first when you troubleshoot a stuck pool valve, because a manual valve and an automatic valve fail for different reasons and demand different fixes. Look for a thumb screw on the handle assembly, which you loosen to disengage the internal gear before rotating. Most manual valves show position labels around the base, so check for a handle-label mismatch that hints at incorrect installation. Confirm the handle lifts and turns freely by hand. Recognizing this design early narrows down pool valve problems and points you toward the correct mechanical repair.
Spotting Automatic Actuators
Spot an automatic actuator by looking for a boxy housing on top of the valve, bolted to the valve body with wiring running into it. You won’t see a manual handle to grip. Instead, look for a toggle switch on the housing, usually set to auto, on, or off. Trace the wiring back to your automation board or a power source to confirm it’s motor-driven.
Flip the toggle to the opposite position and listen. If you hear the motor humming or the housing turning the valve stem, you’ve confirmed an automatic actuator. Silence might mean a failed motor, but the housing and wiring already tell you it’s automatic.
Check for a handle-label mismatch too, since a misinstalled actuator can point the wrong way after service.
Quick Visual Checks Before You Disassemble
Before you take anything apart, check whether your automation’s commanded position matches the valve’s actual position, a mismatch points you straight to the actuator. Listen for motor sound when you send a command, since a silent actuator and a straining one tell you very different things. Then inspect the wiring and connectors for loose plugs, chewed insulation, or water intrusion around the housing.
Command vs. Actual Position
The commanded position tells you what the controller wants, while the actual position shows where the diverter really sits, and comparing the two takes about two seconds. Pull up your automation settings and read the commanded position. Now walk to the valve and check where the diverter actually sits. If the controller says “return” but the handle points to “waste,” you’ve isolated the fault fast.
A mismatch tells you the valve isn’t tracking commands, likely an actuator, wiring, or communication issue rather than a jammed diverter. A match means the command’s executing correctly, so your problem lies elsewhere in the plumbing or downstream.
Note the exact discrepancy before touching anything. This single comparison separates electrical and control faults from mechanical lockups, saving you from tearing into a valve body that’s working exactly as instructed.
Actuator Sound and Wiring
The actuator’s sound reveals whether it’s trying to move the moment you send a command. A humming motor with no rotation points to jammed gears or a mechanical bind. Total silence usually means power or wiring trouble. Run these quick checks:
- Confirm the toggle switch sits in auto or the correct on position, not off or middle.
- Inspect the plug and connectors for looseness, corrosion, or chewed wires around the housing.
- Check for water intrusion inside the actuator, which shorts contacts and kills motion.
- Verify power reaches the actuator by testing voltage at the terminals.
These fast checks separate electrical faults from mechanical failures without disassembly.
Does the Command Match the Valve Position?
The command matches the valve position when the controller’s commanded setting and the valve’s actual position agree. Pull up your automation settings and note the commanded position, open, closed, or a specific diverter angle. Then walk to the valve and read its actual position against the handle label or indicator. If the controller says “closed” but the valve sits open, you’ve isolated a mismatch worth investigating.
This comparison tells you where to look next. A matched command and position points you toward plumbing or internal jams. A mismatch points toward the actuator, wiring, or automation board.
Confirm the toggle switch sits in auto mode, not off or middle. Those positions stop motion and create false mismatches that waste your diagnostic time.
Is Your Actuator Even Trying to Move?
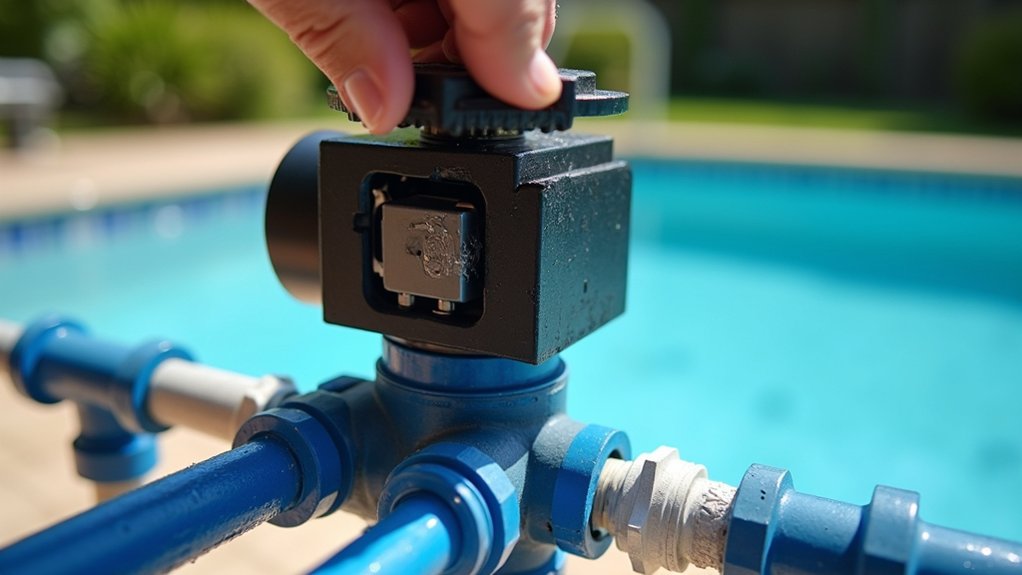
Your actuator’s attempt to move can be confirmed by getting close to the housing and commanding a position change while you observe and listen. A silent actuator points to electrical or motor failure, while a humming unit that won’t rotate suggests jammed gears or a mechanical bind.
Run these checks in order:
- Listen for motor sound the moment the command fires, any hum confirms power’s reaching the motor.
- Feel for vibration against the housing to detect a stalled or straining motor.
- Inspect plugs and connectors for looseness, corrosion, or water intrusion.
- Check for chewed wires around the base.
These results narrow your next step.
Check for Loose Plugs and Chewed Wires
Start by inspecting the connector plugs at the actuator housing, making sure each one is seated fully and locked in place. Wiggle them gently to confirm they aren’t loose, since a partial connection can stop the motor from getting power. Then trace the wires for chewed insulation, exposed copper, or corrosion, rodent damage and water intrusion are common culprits you can spot with a quick visual check.
Inspect Connector Plugs
Inspect connector plugs when a valve won’t respond, because faulty connector plugs often sit at the root of the problem, so check them before you tear into anything mechanical. Kill power at the automation panel first, then unplug each connector at the actuator housing and examine both ends closely.
- Check for corrosion, green or white buildup on pins signals water intrusion and poor conductivity.
- Test pin seating, loose or bent pins won’t complete the circuit, so straighten or reseat them.
- Inspect for moisture, dry out any dampness inside the plug before reconnecting.
- Confirm a firm click, reseat each connector until it locks fully into place.
After you’ve cleaned and reseated everything, restore power and command the valve to move again to verify the connection.
Check For Wire Damage
Chewed or frayed wires break the circuit just as easily as a loose plug, so trace the wiring runs from the actuator back toward the automation panel after you’ve cleared the connector plugs. Run your fingers along each cable, feeling for nicks, exposed copper, or brittle insulation. Rodents often gnaw wiring near the actuator housing, so inspect those low, sheltered sections closely. Watch for water intrusion too, corroded strands turn green and lose conductivity, stalling the motor even when the connection looks intact.
If you spot damage, cut out the compromised segment and splice in fresh wire using waterproof connectors rated for outdoor use. Don’t wrap questionable wire in tape and call it fixed. Once the run tests clean, retest the actuator’s movement.
Loosen the Thumb Screw to Free the Handle
Loosen the thumb screw to free the handle by turning it until it clears the internal gear teeth. On many pool valves, the thumb screw locks the handle to an internal gear that keeps it from rotating freely. Loosening it disengages that gear, so you can test whether the valve turns manually or stays jammed internally.
The thumb screw locks the handle to an internal gear, loosen it to test whether the valve turns freely.
Work through these steps:
- Loosen the thumb screw on the handle until it clears the internal gear teeth.
- Lift the handle upward, since some valves won’t rotate while the handle sits seated down.
- Turn the handle gently and note whether it moves freely or resists.
- Re-seat the handle in its correct position after testing.
If the handle turns easily once disengaged, you’ve isolated a mechanical lockup. Don’t force it. Resistance points to a jam or plumbing problem instead.
Lift the Handle Up Before You Turn It
Lift the handle upward before it’ll rotate, because some pool valves lock their diverter in place when the handle sits seated down. Grip the handle firmly and pull straight up to disengage the internal gear or seated stop. Once it clears, turn it toward your target position while keeping steady upward tension. Don’t force it sideways before lifting, since that stresses the shaft and can crack the assembly.
If the handle turns freely after lifting, you’ve confirmed the lockup was mechanical seating, not a plumbing jam. If it still won’t budge, stop and check for debris or internal binding instead of applying more pressure. After testing, lower and re-seat the handle correctly so the valve holds its operating position.
Why You Should Never Force a Stuck Valve
Never force a stuck valve because that resistance is telling you something, so listen to it instead of overpowering it. Forcing the handle won’t clear the problem; it’ll crack the handle, shear internal gears, or split the valve body. That resistance usually points to a jam or misalignment, not normal operation, so stop and diagnose before applying more torque.
Resistance is a message, not an obstacle. Stop, listen, and diagnose before you force anything and break it.
Check these:
- Debris in the valve body blocking the diverter’s rotation.
- A stuck diverter from internal wear or buildup.
- Misalignment from incorrect reassembly after service.
- Corrosion making the mechanism feel seized.
Work through each cause methodically. If the handle still won’t turn after you’ve ruled these out, disassemble and inspect rather than forcing it.
Flip the Actuator Switch to Test Movement
Flip the actuator switch to the opposite position or auto mode to confirm the mechanism moves at all. Listen closely. A working actuator hums as its motor engages and the valve rotates. Silence signals trouble.
| What You Observe | What It Means |
|---|---|
| Motor hums, valve turns | Actuator works; check automation board next |
| Motor hums, no rotation | Stripped gears or jammed valve |
| Complete silence | Failed motor, wiring, or power loss |
| Partial movement, then stall | Bad limit switch or internal binding |
| Clicking, no motion | Damaged gear teeth or seized diverter |
Match your observation to the table above. If flipping the switch produces nothing, move on to check the toggle position, wiring, and microswitches before you condemn the actuator.
Test the Microswitches and Limit Switches
If the actuator’s silent or stalls, you’ll need to locate the limit switches inside the housing, typically small components mounted near the drive gear or cam. Once you’ve found them, verify each switch’s function by triggering it manually and listening for a click that confirms it’s engaging. A dead or unresponsive switch tells you where the movement’s getting blocked.
Locate Limit Switches
The limit switches sit inside the actuator housing, mounted near the drive gear where they detect the valve’s rotation endpoints. Remove the actuator cover to expose them, then trace the internal wiring to confirm their position. Follow these steps:
- Unplug the actuator from power before opening the housing to avoid shorts or accidental movement.
- Remove the cover screws and lift the cap straight up to reach the internal assembly.
- Identify the small switches positioned against the cam or gear that toggles as the valve rotates.
- Check for water intrusion or corrosion around the contacts, since moisture disrupts switch function.
You’re ready to test their electrical response accurately.
Verify Switch Function
To verify switch function, confirm whether the switches are actually toggling as the valve rotates. Rotate the actuator by hand or in auto mode and listen for the click each microswitch produces at travel limits. If you’ve got a multimeter, check continuity across each switch as it triggers. Continuity should change state at the moment the cam contacts it.
| Test Action | Expected Result |
|---|---|
| Cam contacts switch | Audible click |
| Continuity at trigger | State changes |
| Actuator at limit | Motor stops |
| No click detected | Switch or wiring fault |
| Erratic readings | Corroded contacts |
If a switch never clicks or shows no continuity change, it’s failed. Replace it, then retest the actuator’s full travel before reassembling everything.
When Automation Blocks Your Pool Valve
When automation blocks your pool valve, the problem isn’t the valve at all, it’s the automation controlling it. When your actuator works manually but won’t respond through the controller, you’re likely facing a communication fault between the board and the valve. Work through these checks in order:
- Compare command vs. position by confirming the automation setting matches the actual valve position.
- Flip the actuator switch to manual and cycle it. If it moves, the mechanism is fine.
- Test automation-board communication by sending a command and watching for actuator response.
- Inspect connectors and terminals on the board for loose, corroded, or water-damaged connections.
If the actuator moves manually but ignores board commands, you’ve isolated the fault to automation. Repair wiring or reprogram the controller before touching the valve.
Internal Wear That Seizes a Pool Valve
Internal wear that seizes a pool valve usually comes from worn O-rings, seals, diaphragms, seats, or internal corrosion. Start by inspecting the O-rings and seals, since worn components cause binding that restricts movement. In pressure-controlled valves, check the diaphragm for damage that stops proper opening or closing. Clear debris from the bonnet and exhaust ports, because buildup interferes with internal motion and sealing. Examine the seat surfaces for indentations, cracks, or deterioration; damaged seats often mean you’ll replace the valve body. Look for internal corrosion or mineral buildup, which makes the mechanism feel locked even when everything appears fine externally. After you’ve identified worn parts, replace the failed seals, diaphragm, or full valve rather than forcing motion and risking further damage.
Clean and Lubricate to Restore Valve Motion
To restore valve motion, clean and lubricate the stuck valve so it moves freely again. Many stuck valves just need a good cleaning and fresh lubrication rather than new parts. Start by isolating the valve and relieving system pressure so you can work safely. Then follow this sequence:
- Clear debris from the valve body, bonnet ports, and exhaust ports where buildup blocks internal motion.
- Wipe seats and seals clean, checking for grit that binds the diverter as it rotates.
- Apply pool-safe lubricant to O-rings, seals, and moving parts to cut friction and restore smooth travel.
- Cycle the valve several times to spread lubricant and confirm free movement.
Once it turns cleanly, re-seat the handle and return the valve to its normal operating position before restoring flow.
When to Replace the Valve or Actuator
Replace the valve or actuator when cleaning and lubrication no longer fix the failure. When your handle stays seized after you’ve cleared debris and lubricated the moving parts, the internal seat, diaphragm, or valve body is likely damaged beyond repair, so swap the full valve. Check the seat surfaces for indentation, cracks, or deterioration, and inspect for internal corrosion or buildup that keeps the mechanism feeling seized.
For automatic valves, replace the actuator when the motor stays silent, the gears strip, or the solenoid fails. Confirm the failure first: test the microswitches, verify wiring, and flip the toggle to rule out a communication fault. If the actuator repeatedly stalls or shows electrical failure, stop troubleshooting and install a new unit.
Conclusion: Freeing a Stuck Valve
A pool valve that will not turn is almost always suffering from dried-out lubricant or a worn internal seal, both of which are cheap and usually DIY-fixable. Open it up, clean and lubricate the parts with silicone-based product, and replace any cracked O-rings. Keep the valve lubricated on a regular schedule and stiffness rarely returns to lock it up again.
Shop Quality Pool Plumbing Supplies Today
Fixing valve, plumbing, and skimmer issues starts with the right parts, and Prime Pool Market has everything you need. We offer reliable Pool Plumbing Supplies at discount prices delivered right to your door. Call (877) 650-7665 today or browse our shop and save on every purchase.
Frequently Asked Questions
How Often Should I Service My Pool Valve to Prevent Problems?
Lubricating the valve’s internal seals once or twice a year keeps it turning smoothly and prevents most sticking. Combine that with a quick check for leaks and stiffness. Regular lubrication is the single best habit for valve longevity, since dried-out seals are the most common reason a valve seizes up in the first place.
Can I Turn a Pool Valve While the Pump Is Running?
It is safer to turn the pump off first. Switching a valve under pressure can cause a water hammer that stresses the plumbing and can crack fittings, and diverting flow with the pump running can dead-head it. Shut the pump down, move the valve, then restart, which protects both the valve and the rest of the system.
How Much Does a Professional Pool Valve Repair Typically Cost?
A service call to lubricate or rebuild a valve usually runs 75 to 200 dollars depending on labor rates and whether parts are needed. Replacing a whole valve glued into the plumbing costs more. Since many valve issues are just dried seals, a rebuild kit and some silicone lubricant often solve it for far less yourself.
What Type of Pool-Safe Lubricant Is Best for Valves?
Use a silicone-based lubricant made for pool equipment. It protects rubber O-rings and keeps them supple without degrading them. Avoid petroleum products like Vaseline, which swell and ruin rubber seals over time. The right silicone lubricant is inexpensive and is what keeps valves turning freely for years between services.
Are Certain Pool Valve Brands More Reliable Than Others?
Jandy, Pentair, and Hayward are the brands pool techs trust most, valued for sturdy bodies and easy-to-find rebuild kits. That parts availability matters as much as durability, since it means you refresh the seals rather than replace the valve. Whatever the brand, matching the valve to your pipe size is what ensures reliable performance.